Clock
Creating your second tutorial skin
In the previous tutorial, you should have already created a folder under Skins called Tutorials. We are going to add a new folder under that one to create our new skin. Under Skins\Tutorials\ create a new folder called Clock.
In that Tutorials\Clock folder, create a new empty text file. In Windows explorer, you can simply right-click in the folder and say "New / Text document". Give it the name Clock.ini.
Now, left-click the Rainmeter icon in the Windows notification area on your taskbar, to open the Manage dialog. Click on the Refresh all button on the bottom left, and you should see your new Tutorials / Clock config in the list. Find Clock.ini in the list, right-click it and say "Edit". This will open the new skin file in your default text editor. Don't load the skin just yet, we need to add some code first...
Building the Clock skin
This tutorial will introduce using Measures in a skin. Measures are used to obtain some information in Rainmeter, from your computer's system, text files, web sites, and other sources. In addition, we will be using some more features of the String meter and dip our toes a little deeper into using action options and Bangs in your skin.
First, as we did in our earlier tutorial, let's add the [Rainmeter] section to control the Update speed of the skin.
[Rainmeter] |
Now let's add our first Measure, in this case a Time measure to retrieve information about the system time from your computer.
[MeasureTime] |
Do check out the manual entry for the Time measure to see how that Format option is used to obtain the time information you want. We are using a format of "hour in 12 hour time:minutes" for this measure.
So let's add a meter to display this value we obtained with our measure. First, we are going to use the MeterStyle option by creating a [TextStyle] section to set up some common string formatting options. This way we won't have to repeat them in every meter we create. Then add the new [MeterTime] meter.
[TextStyle] |
The key to using measures and meters together is using the MeasureName option to "bind" the measure [MeasureTime] to the meter. What that means is that this meter will display the value returned by the measure on each Update.
So let's load our new skin and take a look at where we stand. From the Manage dialog, find the Clock.ini entry in the list and click on the Load button on the upper right.

Drag the skin anywhere on the screen you like. Rainmeter will remember the position any time you load this skin in the future. You can also right-click the skin to change other skin options as desired.
Adding more measures and meters
We are going to use various elements of the system time in different meters in our skin, so let's create some more measures to gather different types of information. Go back up to just under our [MeasureTime] section and add some new measures.
[MeasureSeconds] |
Now, start building meters to display all these different measure values. Let's start with the first one, so we can look at a new meter positioning concept. Head back down to the bottom of your skin and add this new meter.
[MeterSeconds] |
Note that we are using the MeasureName=MeasureSeconds option to bind this meter to the appropriate measure.
Now, if you look above, you will see that in the MeterStyle section [TextStyle] we have defined many format options for our string meters that we want to share with the meters rather than repeating them in each one. One of these is the StringAlign option, which will allow us to align the text in the meter based on the X and Y options for the meter. In this case, we are going to right-align all of our meters. You will see why as we continue with the layout. In the previous [MeterTime] meter, we aligned the meter so the right-most edge was at the X position of 165 in the skin. For this meter, we are aligning the right-most edge at the X position of 204.
In addition, we want this meter to have a different color. So, we are "overriding" theFontColor=255,245,207,255 option we set in the [TextStyle] MeterStyle, by specifically setting FontColor=255,231,135,255 for this meter.

Save and refresh the skin to see the changes.
Continue creating the meters at the bottom of your skin, to display the information from the various measures.
[MeterAMPM] |
As you can see, there is a different approach to binding measures to meters in the [MeterMonthDayYear] meter above.
[MeterMonthDayYear] |
Since we want to use the value of three different measures in this meter, we use the MeasureName option to define all three measures as being bound to this meter. Then we can use the Text option with %1 %2, %3 to display each of the three measure values, including adding a hard coded comma for formatting.
Save and refresh the skin to see the changes.
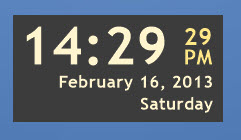
Now you can see why we wanted to right-align our string meters. As the time changes and becomes longer and shorter, we don't want the position of the meters to change. We want to keep things lined up and tidy. The following image demonstrates how it looks when the time is much longer.

Let's add a background image like we did in the earlier tutorial, by going up above all the existing meters and adding a new Image meter.
[MeterBackground] |
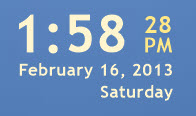
Save and refresh the skin to see the changes. Congratulations! Nice looking clock skin.
Some extra credit work
We are going to add a couple more features to our clock, so we can touch again on using Action options and Bangs in your skins.
First, let's add the ability to toggle the display of the time between 12-hour and 24-hour when we hover the mouse over the [MeterTime] meter. Find that meter, and add a couple of lines.
[MeterTime] |
This is using a Mouse action and a handful of Bangs.
What we are doing when we move the mouse over the meter is to use the !SetOption bang to change the Format option of the [MeasureTime] measure to obtain the time from the system using the code for 24-hour time (%H) instead of 12-hour time (%I). Then we are using the !UpdateMeasure, !UpdateMeter, and !Redraw bangs to have the change take place as soon as we move the mouse over, and not wait for the next update of the skin.
When we move the mouse away from the meter, we are using the same combination of bangs to set the format back to 12-Hour time and update things.

Mouse Off
Mouse Over
"It tolls for thee"
Next, we can add some sound to our clock. What we will do is have the skin play a .wav file of a grandfather clock striking when the time is exactly on the hour.
First, we need get the sound file and put it in the right location in your skin folders. Right-click the link below and save the file HourChime.wav to your computer. Put it in a new Sounds folder in our Skins\Tutorials\@Resources folder we created before. So it will be Skins\Tutorials\@Resources\Sounds\HourChime.wav
Now we can add a new measure to control when the sound is played. Let's go up to the top of the skin, right after the [MeasureTime] measure we already have, and add a new one.
[MeasureTime] |
This [MeasureChimeHour] measure is getting the number of minutes (%M) from the system time, and then using an IfAction to check the value of the measure on each update. If the value is equal to zero IfEqualValue=0, then the associated IfEqualAction=[Play "#@#Sounds\HourChime.wav"] is executed. This uses the Play bang to load and play the HourChime.wav file.
After making the changes, save and refresh the skin. Congratulations! You now have a beautiful, functional AND annoying skin!
We have jumped around a bit, so here is the entire completed skin so you can check that your code is the same.
[Rainmeter] |