Using Rainmeter
The first time you run Rainmeter, your desktop will look something like this:
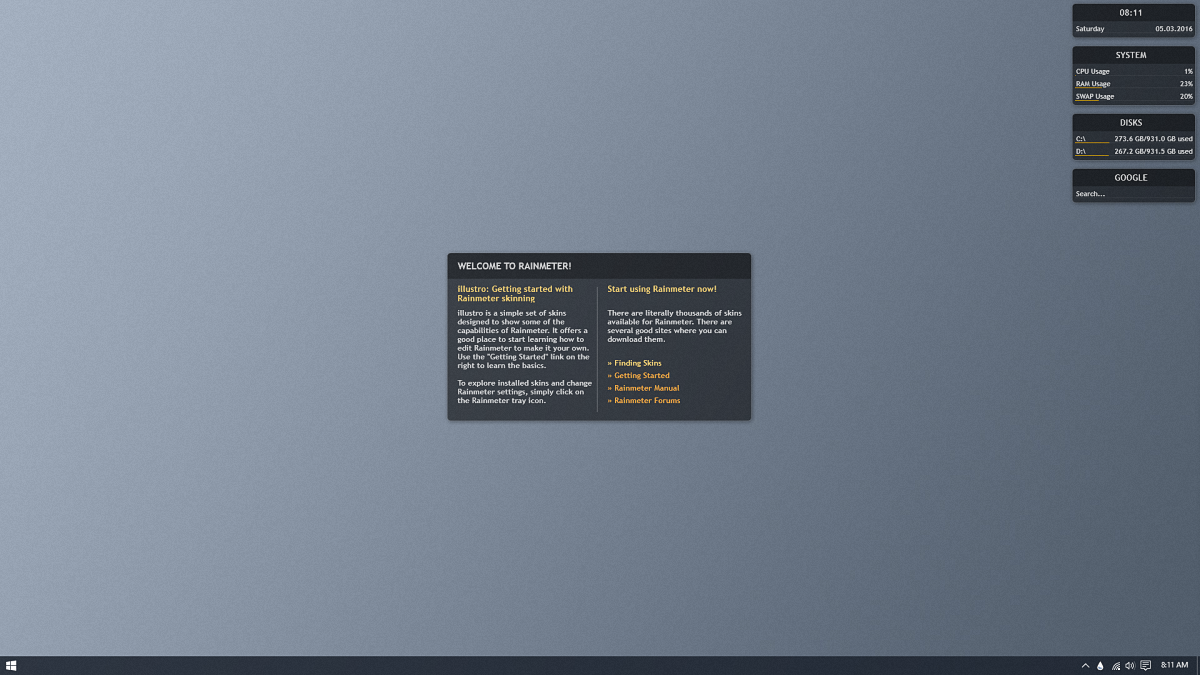
Illustro, the standard "suite" that comes with Rainmeter.
Each small window on the right side of your screen ("System," "Disk," and so on) is a skin. Rainmeter remembers each skin's location and settings independently. To move a skin, just click and drag it to a new location.
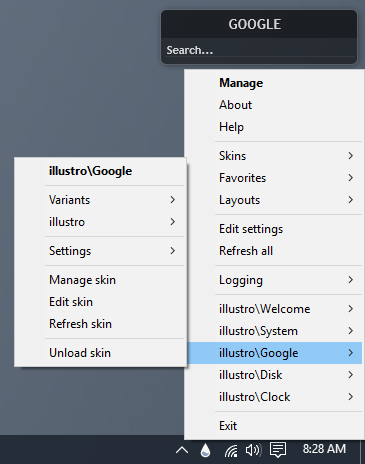
Context Menu
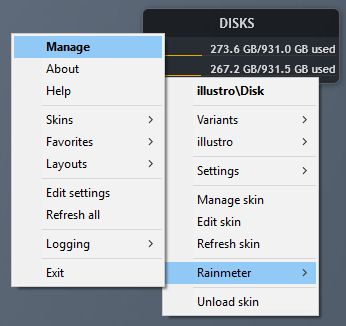
A typical skin's context menu.
The easiest way to interact with Rainmeter skins is through the context menu. A skin may have any number of tabs, buttons, menus, or other bells and whistles in its design—but no matter what, you can still access the context menu by right-clicking on the skin.
Some skins may assign some other action to right-clicking on the skin. In this case, you can still override this action and open the context menu by holding down the
Ctrlkey when you right-click.
All skins have the same basic context menu items that you can see in the screenshot on the right. Some skins may have custom items to their context menus, but these will not replace the basic items. Instead, both types of items will appear alongside each other.
Loading and Unloading
You can use the context menu to load skins from your library. Right-click on any of the illustro skins, and select illustro → Google → Google.ini. The "Google" skin will appear in the top-left corner of your desktop. You can now drag it into place alongside your other skins.
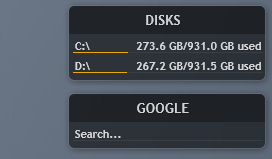
The Google skin has been loaded.
You can also unload a skin with the context menu. Right-click the new Google skin, and select Unload skin. You will see the skin fade away and disappear.
When a skin is unloaded, its location and settings are still saved. To see how this works, load the Google skin again. Notice that, instead of appearing in the top-left, it appears in the same location where you dragged it before.
Variants
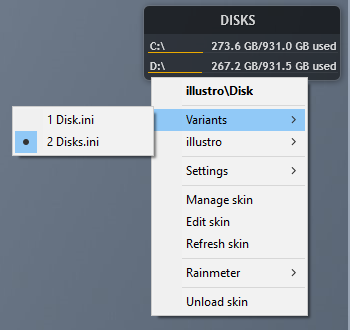
"Disk" has two variants.
When you loaded the Google skin, there was only one option under the "Google" menu, Google.ini. This is how most skins work: each skin is saved as a "SkinName.ini" file in a separate folder. What happens when there is more than one skin in the same folder? The answer is that these skins become variants of each other.
To see an example of a skin with variants, right-click the "Disk" skin and select Variants in the context menu. You can see that the 2 Disks.ini variant is already active. Click 1 Disk.ini to switch to that variant. Notice how the new variant replaces the old variant on the desktop. Variants share the same location and settings, and only one of a skin's variants may be loaded at one time.
Settings
Rainmeter keeps track of a number of basic skin settings. These settings are created automatically for each skin. They include things like position (whether a skin stays on top of all windows or is pinned to the desktop), snap to edges (whether skins automatically align with other skins when they are dragged close together), and of course, the skin's coordinates (location on the desktop) and which variant is loaded.
"Welcome" is now transparent.
One of the most popular skin settings is transparency. Try changing the transparency of the "Welcome to Rainmeter!" skin in the center of your desktop. Right-click the skin to open the context menu, then select Settings → Transparency → 50%. Now you can partially see through the skin and onto the desktop below.
Rainmeter does not manage any other "settings" beyond the basic ones found here. Extra customization options—like fonts, colors, images and passwords—are all stored and managed separately by the skins themselves, as variables. This means that saving and restoring your layout settings in Rainmeter will not affect your customizations for specific skins. (It also means that backing up your Rainmeter settings will not protect your customizations, so make sure to back up your skin files, as well.)
Tray Icon
There are two ways to open a skin's context menu.
Rainmeter has a Windows Notification Area (formerly known as System Tray) icon. You can reach the context menu for each of your loaded skins by right-clicking on the icon. This is a handy way to access a skin when you can't right-click it for some reason (usually when the skin is hidden). It's also a good place to see a complete list of all the skins that you have loaded.
Manage
Aside from the context menus, the most important part of Rainmeter's basic user interface is the Manage window. Open Manage by selecting Manage from the context menu, or by left-clicking once on the tray icon.
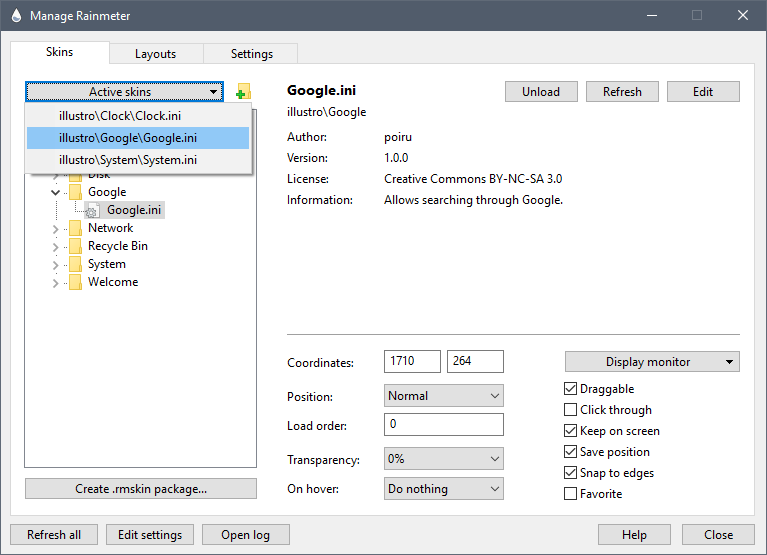
The "Manage" window shows your whole library.
Skins
The Skins tab allows you to load, unload, or change settings for your entire library of skins. You can go to a specific skin's settings in the Manage window by choosing Manage skin from the skin's context menu, or choosing from the Active skins drop-down menu in Manage. You can also right-click to open any skin's folder in Windows Explorer, where you can see other resource files for that skin, such as images or scripts, or delete a skin's file, from your computer.
The Manage window does many of the same tasks as the context menu, but when you need to load or edit options for a number of skins at the same time, it's much easier to use the window.
Layouts
Manage is also where you can load and save layouts. A layout is a permanent copy of your skin settings, including both loaded and unloaded skins. (Again, these settings do not account for changes to your skin .ini or .inc files, which include any extra customization options. Loading a layout will also not recover a skin that has been deleted from your library.) When you save a layout, you have the option of excluding settings for unloaded skins, which is a good way to "clean up" skins that you may no longer have or use. You can also associate your current wallpaper with your layout.
About
The last part of Rainmeter's interface is the About window. Open About by selecting About from the context menu, or by clicking Open log in Manage.
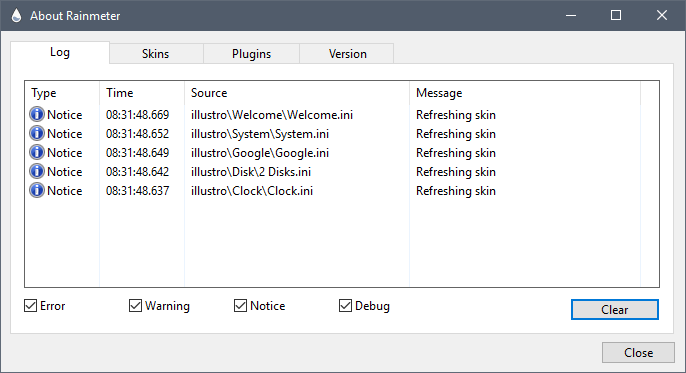
The "About" window shows you what Rainmeter is doing in real-time.
Log
The Log tab is where Rainmeter keeps a running record of what it is doing. This is also where Rainmeter reports errors related to a skin or the program itself. In addition, the Skins tab will show you the current values of all measures and variables in the skin. (You'll learn more about those later.) This makes the About window an invaluable assistant whenever you're writing, editing or troubleshooting a skin.
Version
The other tabs show information about the version of Rainmeter you are using, as well as the versions of plugins that you have installed. If you are ever having a technical issue and need to ask for support from the Rainmeter community, the About window is where you can find a wealth of information about your Rainmeter setup that may be helpful in solving your problem.
Exiting Rainmeter
Rainmeter saves all settings automatically as soon as you change them. If you exit Rainmeter, (by clicking Exit in the context menu) all skin settings and your current layout will be loaded automatically the next time Rainmeter is launched.