Manage
The Manage window in Rainmeter is the primary means of controlling the application and skins. It consists of four main tabs:
- Skins: Displays a list of installed and loaded skins. This tab is used to view information about skins, manage skin settings, and control buttons to load/unload/refresh skins.
- Layouts: Used to save and load the current state of Rainmeter. Active and inactive skins, skin positions, and other Rainmeter settings.
- Game mode: Used to unload some or all skins when running a full-screen game, in order to save Rainmeter CPU and GPU resources while playing.
- Settings: Controls high-level Rainmeter settings such as the interface language and logging.
Manage is accessed in several ways:
- Left-Click the Rainmeter icon in the Windows Notification Area on the taskbar.
- Right-Click the Rainmeter icon in the Windows Notification Area on the taskbar and select "Manage".
- Using the !Manage bang as an action in a skin or from the command line as a parameter to Rainmeter.exe.
- Right-Click any running skin on the desktop and select "Manage skin".
Buttons used to control Rainmeter:
- Refresh all: Refresh the entire Rainmeter application, including all currently active skins.
- Edit settings: Manually edit the settings in Rainmeter.ini with the text editor associated with .ini files.
- Open log: View the Log tab of the Rainmeter About window.
- Create .rmskin package: Package skins(s) for distribution in the .rmskin format.
The Skins tab

There are four main areas in this tab.
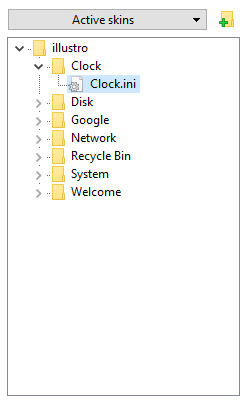
The skins list
List of currently installed skins. This contains all Skins found when Rainmeter is started or refreshed.
The list consists of the config folder for each skin, and the skin .ini files for each config.
The list is updated when Rainmeter is refreshed.
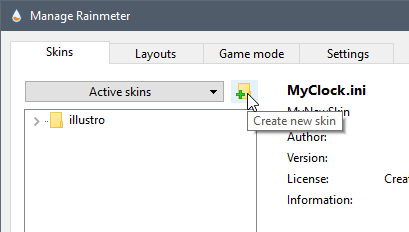
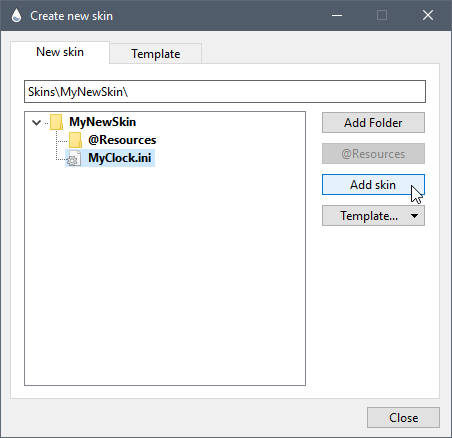
Create new skin
The "Create new skin" button open a dialog where you can easily add new skin folders and skin .ini files to Rainmeter.
New skin .ini files added will use a default or custom template as desired.
New items will be added to Rainmeter, and a full refresh of the application and all skins will take place. Your new folders and skins will appear in the Skins panel of Manage and are ready to be edited or loaded.
See New Skin for details.
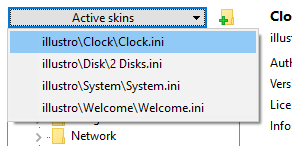
Active skins
This pull-down will contain a list of all currently loaded and active skins in Rainmeter.
Clicking on a skin will make that skin active in the Manage tab.
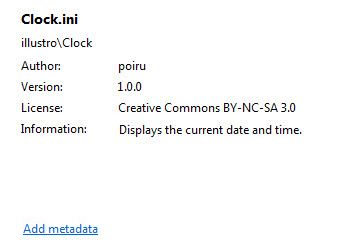
Metadata
Displays the information in the [Metadata] section of the selected skin.
This includes Name, Config, Author, Version, License and Information fields.
If a skin does not contain a [Metadata] section, the Add metadata link in this area will add an empty section with all fields.
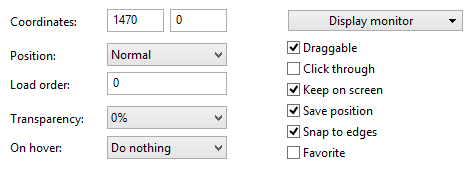
Skin Settings
For a selected active skin, shows the current values of various settings. Changes will immediately effect the skin on the desktop.
- Coordinates: The window X and Y location of the skin on the screen in pixels.
- Position: The z-position of the skin on the desktop relative to other windows.
- Load order: The loading order of the skin on the desktop relative to other skins.
- Transparency: The transparency of the skin.
- On hover: The on hover behavior of the skin.
- Draggable: The draggable setting for the skin.
- Click through: The click through setting for the skin.
- Keep on screen: The keep on screen setting for the skin.
- Save position: The save position setting for the skin.
- Snap to edges: The snap to edges setting for the skin.
- Favorite: Adds or removes the current skin in a list of Favorites accessed with the Rainmeter context menu.
- Display monitor: Settings for the monitor on which the skin is displayed.
Use default: Primary monitor: Removes the@Ndirective from WindowX/WindowY settings.
@0, @1, @2, ... , @32: Adds the specified monitor number to WindowX/WindowY settings.@0represents "The Virtual Screen".
Auto-select based on window position: If checked, the WindowX/WindowY@Nsettings are made automatically based on the position of the meter's window. This setting will be unchecked when a specific monitor is selected.
Buttons used to control skins:
- Unload / Load: Unload (make inactive) the selected skin if it is currently active, or load it if not.
- Refresh: Refresh the selected active skin.
- Edit: Edit the selected skin with the text editor associated with .ini files.
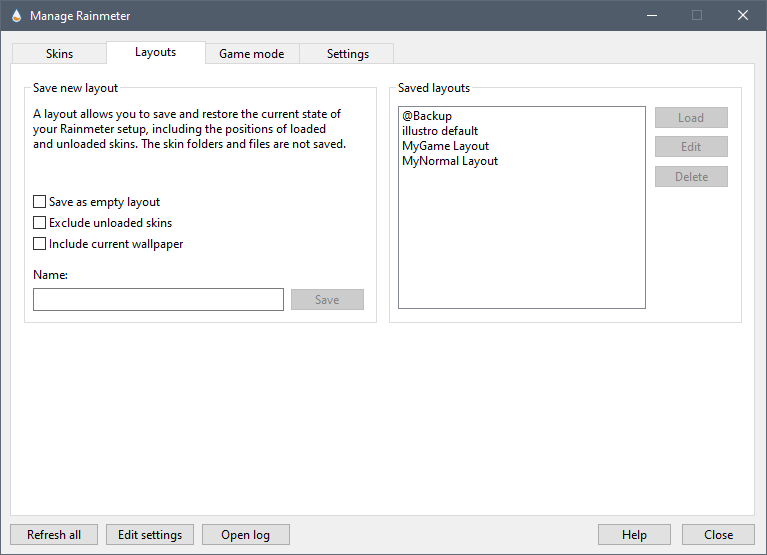
The Layouts tab
Layouts in Rainmeter are a way to save and load the current state of the Rainmeter settings. This saves the positions of currently active and inactive skins, as well as all other settings stored in the current Rainmeter.ini file. The layout can then be loaded to restore any saved state. Layouts are saved in the Rainmeter settings folder.
Note: The skin folders and files themselves are not saved with a layout.
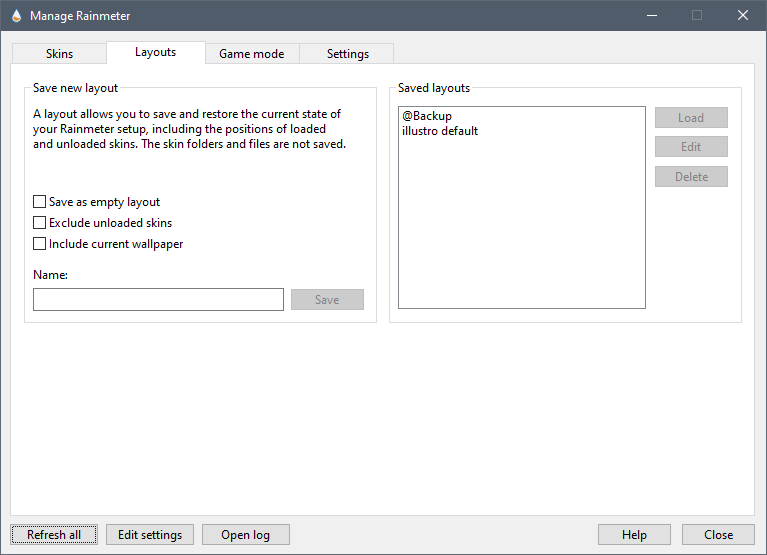
There are two main areas in this tab.
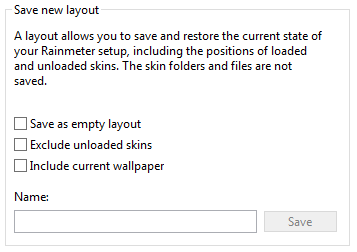
Save new layout
Note: If an existing layout is selected from the Saved layouts list or typed in, saving will replace the existing saved layout with the current state.
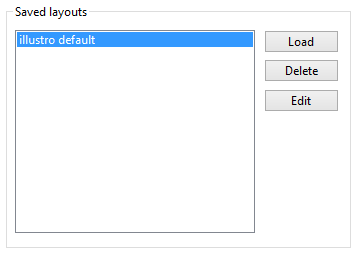
Saved layouts
Global options under [Rainmeter] are not replaced when a layout is loaded, preserving local settings such as:
- ConfigEditor
- SkinPath
- DisableVersionCheck
- Language
When loading a layout, the current Rainmeter state will automatically be saved as a layout named @Backup.
Hint: A layout can be loaded from the Windows command line using the !LoadLayout bang.
"C:\Program Files\Rainmeter\Rainmeter.exe" !LoadLayout "My Saved Layout"
The current Rainmeter state will be replaced with the named layout. If Rainmeter is not running, it will be started.
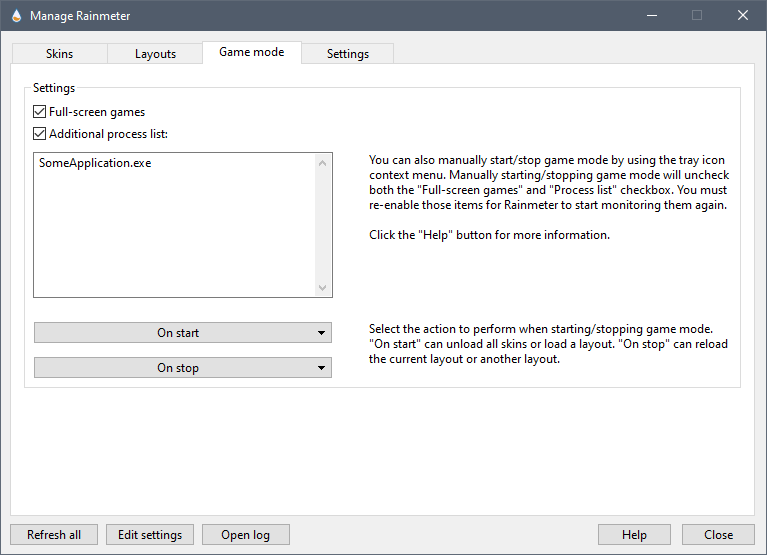
The Game mode tab
Game mode is used to unload some or all skins when running a full-screen game, in order to save Rainmeter CPU and GPU resources while playing.
This can be configured to be automatically triggered by checking the Full-screen games box, which will automatically enter Game mode when any full-screen D3D game is active on the primary monitor.
In addition, one or more processes of your choice that are not full-screen D3D games can be entered one process per line in the Additional process list text box, and when any of those processes are running, game mode will be triggered.
On start
What happens when Game mode starts is controlled by the On start pulldown. This can be set to the default Unload all skins or any defined Layout that you create.

On stop
What happens when Game mode stops is controlled by the On stop pulldown. This can be set to the default Load current layout, which will load the skins that were running before Game mode was triggered, or any defined Layout that you create.
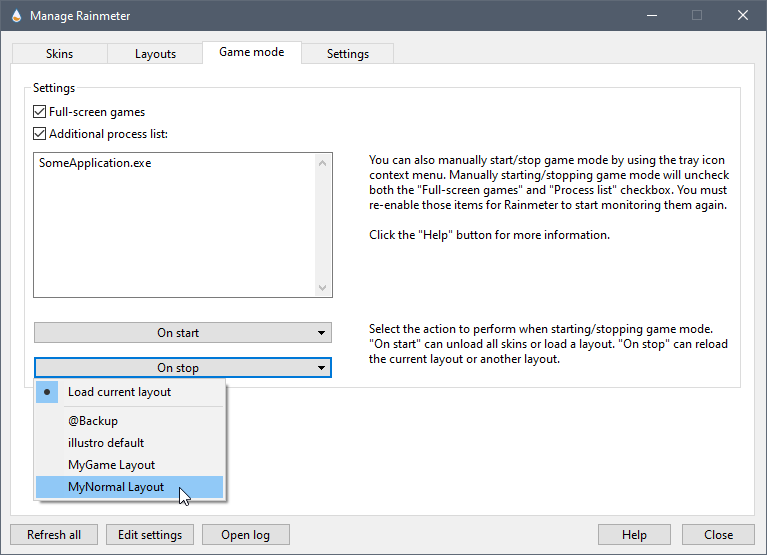
Simply create the Layouts you want to use for Game mode start and stop, and select them from these pulldowns.
Game mode can also be started and stopped manually, as well as fully configured, from the Rainmeter tray icon context menu.

Note that if you manually start or stop Game mode, the checkboxes for automatic triggering will be turned off, and you will need to enable them again, either from the context menu, or from Manage.
The Settings tab
This tab has some high level settings for the Rainmeter application, as well as controls for Rainmeter's logging capability.

General
- Language:
Use the pull-down menu to select the desired language for all Rainmeter user interfaces. This does not have any effect on languages used in skins. - Editor:
Enter or browse to the text editor that will be used when "Edit skin" or "Edit settings" is selected. - Check for updates
When started, Rainmeter will check for a newer version. A notification will be raised to alert the user to the new version, and clicking on the notification will take the user to https://www.rainmeter.net in the default browser, where the new version can be manually downloaded and installed if desired. - Automatically install updates
If both this checkbox and "Check for updates" are enabled, Rainmeter will automatically download and install any new version of the software it finds when started. If "Check for updates" is not checked, this setting is disabled and ignored. - Disable dragging
If selected, automatically sets the draggable state of all active skins to prevent dragging skins with the mouse. - Show notification area icon
Shows or hides the Rainmeter icon in the Windows notification area (system tray).
Note: If all skins are unloaded, the notification area icon will appear, regardless of this setting, in order to avoid a situation where you can't interact with Rainmeter at all. - Use hardware acceleration
Turns on or off the use of the GPU to accelerate drawing, and offload some processing and memory from the CPU to the GPU. This requires that Rainmeter be restarted to change. - Reset statistics
When clicked, clears all saved network and other statistics from the Rainmeter.stat file in the settings folder.
Logging
In addition to the real-time logging of errors, warnings and notices in the Log tab of the Rainmeter About window, Rainmeter can log activity to a Rainmeter.log text file, which will be created in the settings folder.
- Debug mode
If selected, a more detailed logging mode will be used in the About window, and when Log to file is active. This should only be used when debugging a problem, as leaving this level of detailed logging on can impact Rainmeter performance. - Log to file
If selected, Rainmeter will append log entries to the Rainmeter.log file while running. Unchecking this item will turn off logging, but the Rainmeter.log file will be retained. - Show log file
If clicked, the Rainmeter.log file will be loaded in the text editor associated with .log files. - Delete log file
If clicked, the Rainmeter.log file will be deleted. If Log to file is currently active, it will automatically be turned off.